How to Set Target Limits on the Juno Slide Gate Opener Chain
Setting the target limits on your Juno Slide Gate Opener is a crucial step to ensure precise and safe operation of your gate system. Properly configured target limits define the exact positions where the gate should stop when fully opened or closed, preventing potential misalignment or mechanical strain. This process involves manually positioning the gate, marking specific chain links, and attaching limit target magnets in alignment with the gate's sensors. Accurate installation of these components guarantees smooth operation and extends the lifespan of your gate opener. By following the manufacturer's guidelines, you can achieve optimal performance and reliability from your Juno Slide Gate Opener. For detailed instructions and visual aids, refer to the comprehensive guide provided by Apollo Gate Openers.
Step-by-Step Instructions
Begin by manually positioning the gate at either its fully open or fully closed position. This ensures that the target limits are set accurately and prevents unnecessary adjustments later. If needed, refer to the official manual for step-by-step instructions on how to safely move the gate.
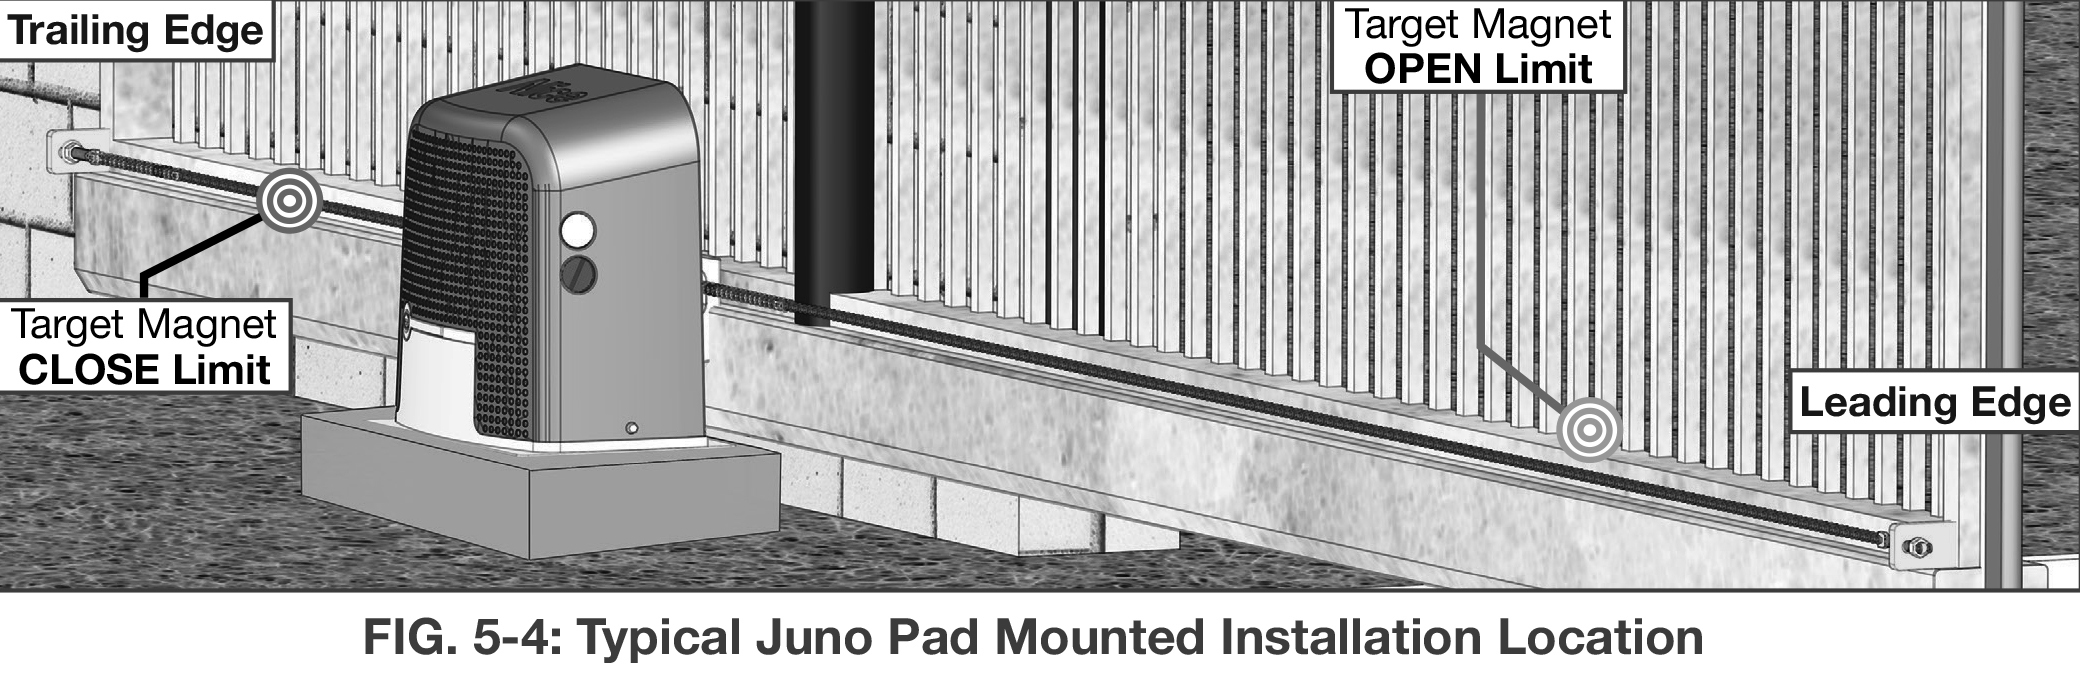
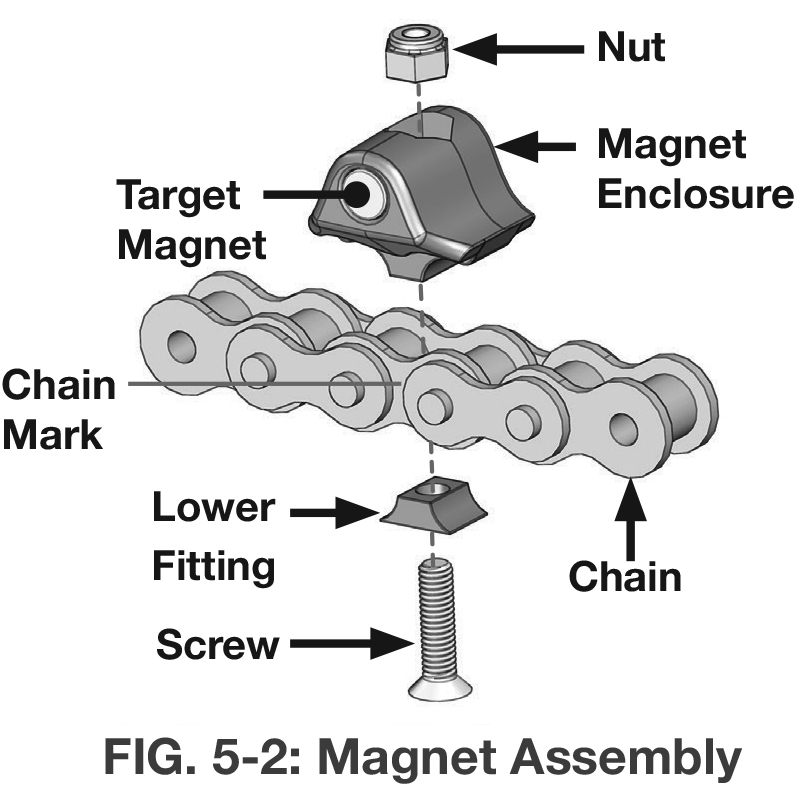
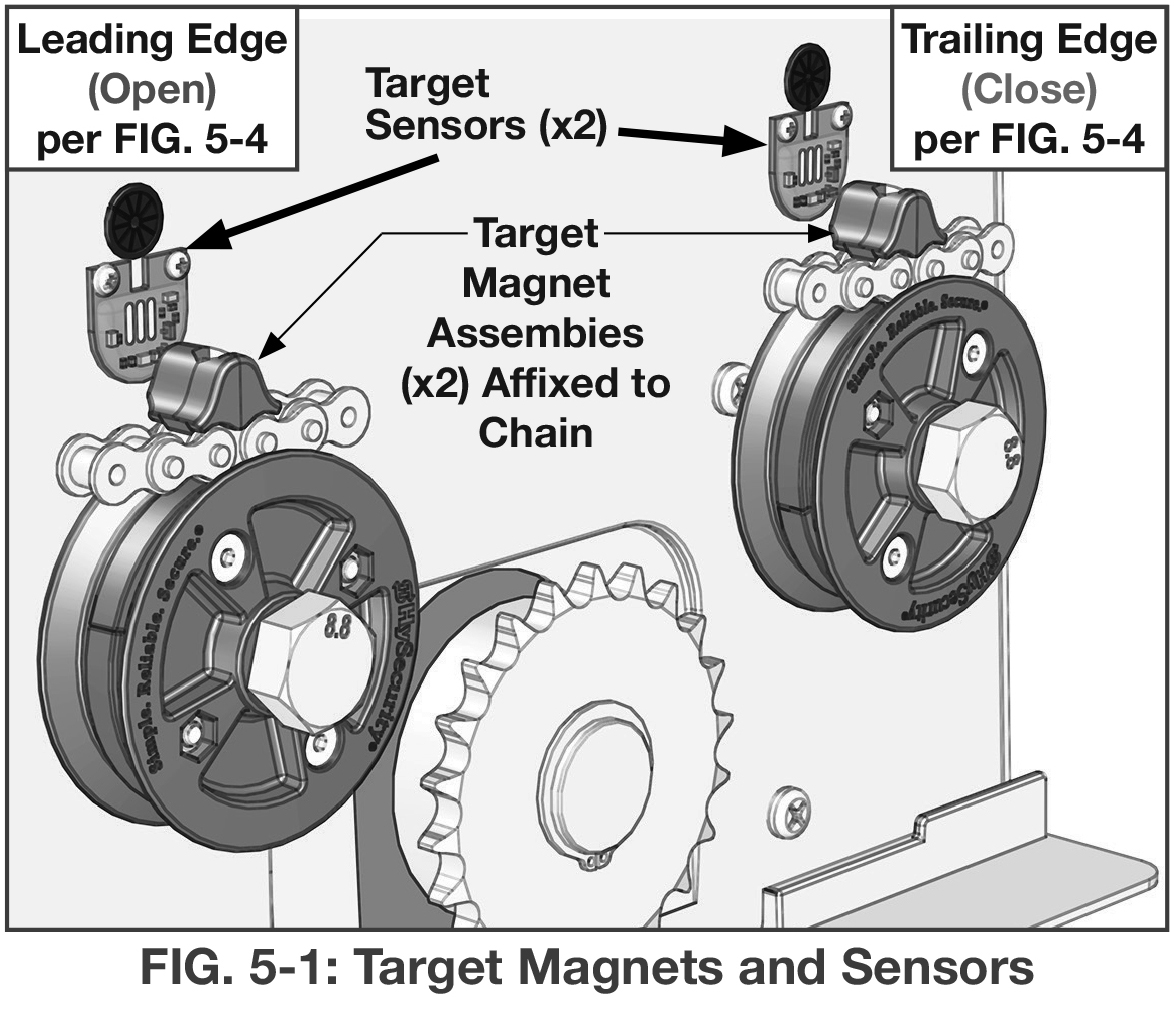
Locate the target sensor that is positioned closest to the end of the gate. Using a marker or suitable tool, clearly mark the fixed (internal) chain link that is directly in front of this sensor. This step is crucial for aligning the limit target magnet correctly.
Carefully push the gate approximately 6 inches beyond the marked location to create enough working space for installation. This will allow you to access the chain section where the limit target magnet will be attached. (Refer to the illustration on the right for proper positioning.)
Securely attach the limit target magnet to the fixed (internal) chain link at the marked position. Ensure that the magnet is firmly in place and properly aligned with the sensor to allow for accurate detection and gate operation.
Verify that the wiring for the target sensor remains unchanged and intact. The sensor wiring should not be modified, regardless of the direction in which the gate opens. Any incorrect wiring could lead to improper gate functionality.
Repeat the entire installation process for the second limit target magnet, ensuring that it is correctly placed and aligned for the opposite limit. Double-check both magnets to confirm they are securely fastened and in the right positions.
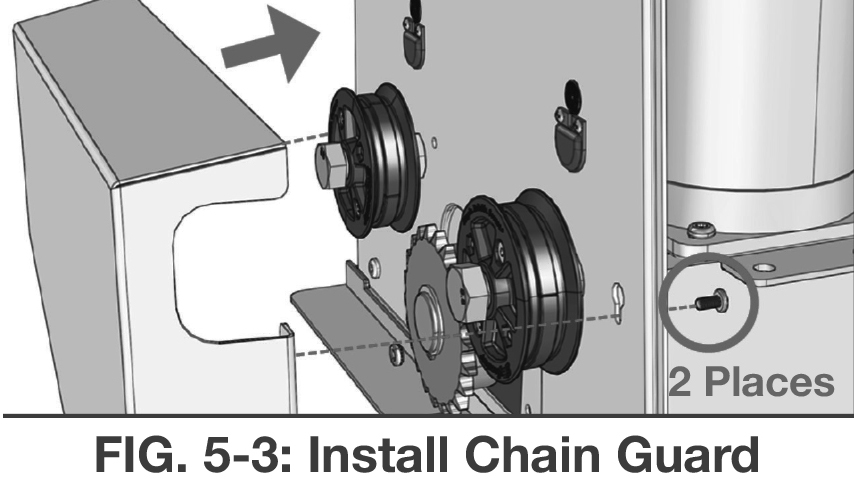
Finally, install the chain guard as per the reference diagram provided in the manual. The chain guard serves as a protective barrier, preventing obstructions and ensuring the longevity of the gate’s mechanical components.
Note: The trailing and leading edge positions depend on the gate opening direction. All labels should be referenced based on the specific gate installation. Some chain links (with magnetic targets installed) should be positioned in front of each of the two limit sensors to ensure proper alignment.
Upon successful installation, your Juno Slide Gate Opener should exhibit precise and reliable operation. The gate should come to a smooth stop at both the fully open and fully closed positions, aligning perfectly with the designated target limits. The limit target magnets should be securely attached to the fixed chain links, positioned directly in front of the target sensors as specified in the installation guide. The chain guard should be properly installed, ensuring safety and protection of the gate's mechanical components. Additionally, the target sensor wiring should remain unaltered, maintaining consistent functionality regardless of the gate's opening direction. This meticulous setup guarantees that your gate operates seamlessly, reflecting the quality and precision engineered into the Juno Slide Gate Opener.
Contact Us
The all-new Juno 310 AC and Juno 310 Solar residential slide gate operators from Apollo set a new standard in gate automation technology. Whether you're seeking a reliable AC-powered solution, an eco-friendly solar-powered option, or expert guidance for your next gate opener project, our knowledgeable sales team is here to help. If you have any questions, feel free to reach out or visit our Resources Hub for instructional guides, detailed specifications, and more informational content. Elevate your property with the innovation, convenience, and reliability of the Juno series - experience the future of gate automation today!