How to Program My Apollo Gate Opener Remote Transmitter
Programming your Apollo Gate Opener remote can be done in a few simple steps. All NICE Transmitters or “Remotes” can be programmed to a NICE Plug In Receiver or to a NICE Universal Digital Receiver. No matter what version or color of NICE transmitter you have, programming is a quick and easy process.
Programming Your Remote To A Plug In Receiver
Step 1:
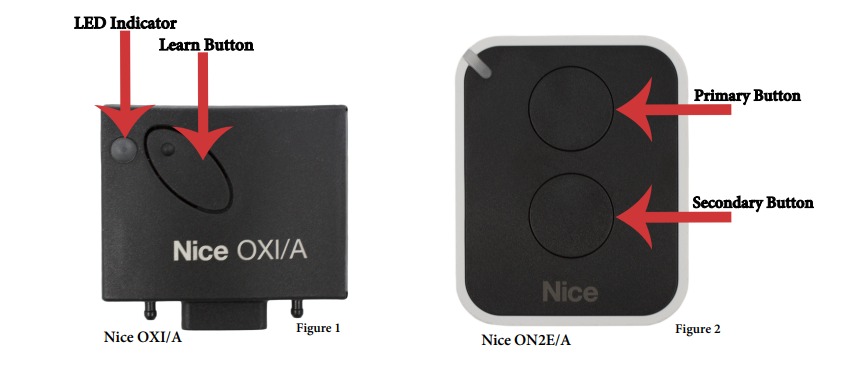
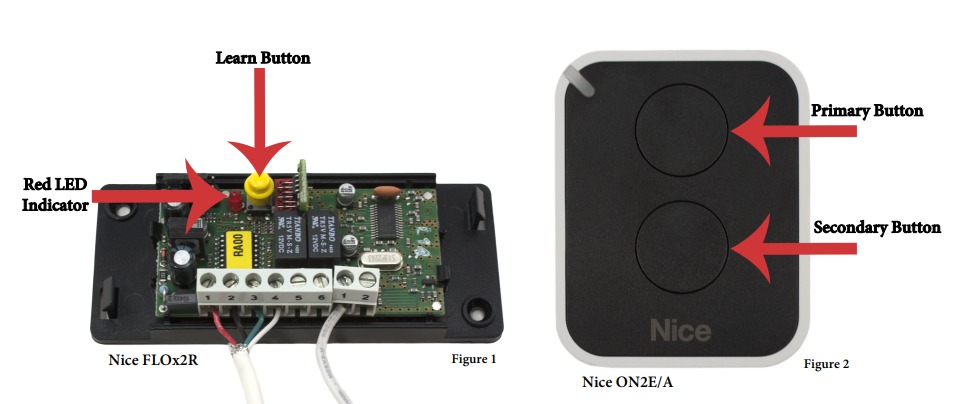
Plug the receiver into the control board. Press and hold the “Learn Button” until the green LED indicator is on, then release.
Step 2:
While the LED indicator is on, press and hold the top button on the transmitter until the LED indicator flashes 3 times. The top button on the transmitter is the primary button, and the 3 flashes will confirm successful programming.
Repeat these steps for additional transmitters and buttons.
Programming Your Remote To A Universal Digital Receiver
Step 1:
Confirm that the receiver is hardwired. Press and release the yellow “Learn Button” inside of the control box. The red indicator light will turn on.
Step 2:
While the red light is on, press and hold the top button on your transmitter until the red indicator light turns off. Release the transmitter button. Wait a few seconds, then press and release the transmitter button again. The receiver light should flash 3 times. The top button on the transmitter is the primary button, and the 3 flashes will confirm successful programming.
Repeat these steps for additional transmitters and buttons.
Programming & Wiring Instructions For Secondary Button
The second button, used to control another gate near the primary gate, requires an extra step.
Step 1:
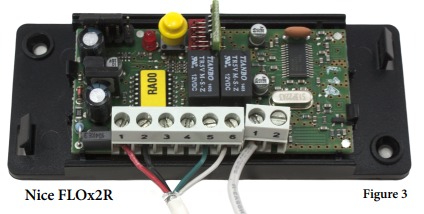
Confirm the receiver is hardwired. Remove the green and white wires from the terminals 3 and 4 on the receiver. Place the green and white wires in terminals 5 and 6, respectively.
Step 2:
Press and hold the yellow “Learn Button” on the receiver inside the control box. The red indicator light should turn on.
Step 3:
While the red indicator light is on, press and hold the secondary button on the transmitter until the red indicator light on the receiver turns off. Release the transmitter button. Wait a few seconds, and then press and release the secondary button on the transmitter. The receiver light should flash 3 times. The bottom button on the transmitter is the secondary button, and the 3 flashes will confirm successful programming.
These instructions apply to the 4-Channel transmitters as well, with your choice of which buttons become primary, secondary, and so forth.
If you require further information about your receiver or transmitter, check out our manuals and specifications page for manuals, specifications, and set-up instructions.
Manuals and Specifications